Index
{{ $t('Preparation') }}
{{ $t('Iceberg creation') }}
{{ $t('Basic settings') }}
{{ $t('Basic editing') }}
{{ $t('Descriptions and Links') }}
{{ $t('Advanced editing') }}
{{ $t('Categories') }}
{{ $t('Entry Markers') }}
{{ $t('Download image') }}
1. Preparation
Please read the
rules of the site first.
If you are still looking for an idea, check out the
Ideas page, the #requests channel in our
Discord server or the
subreddit.
{{ $t('The best choices are usually topics you are already deeply familiar with.') }}
2. Iceberg creation
When you have chosen an iceberg name (you can change it later), input it in the top left of the
main page and click on "Create new iceberg".

{{ $t('You will be redirected to a template selection page where you can choose the starting background image for your iceberg. Don\'t worry, you can change it later, even upload your own images!') }}
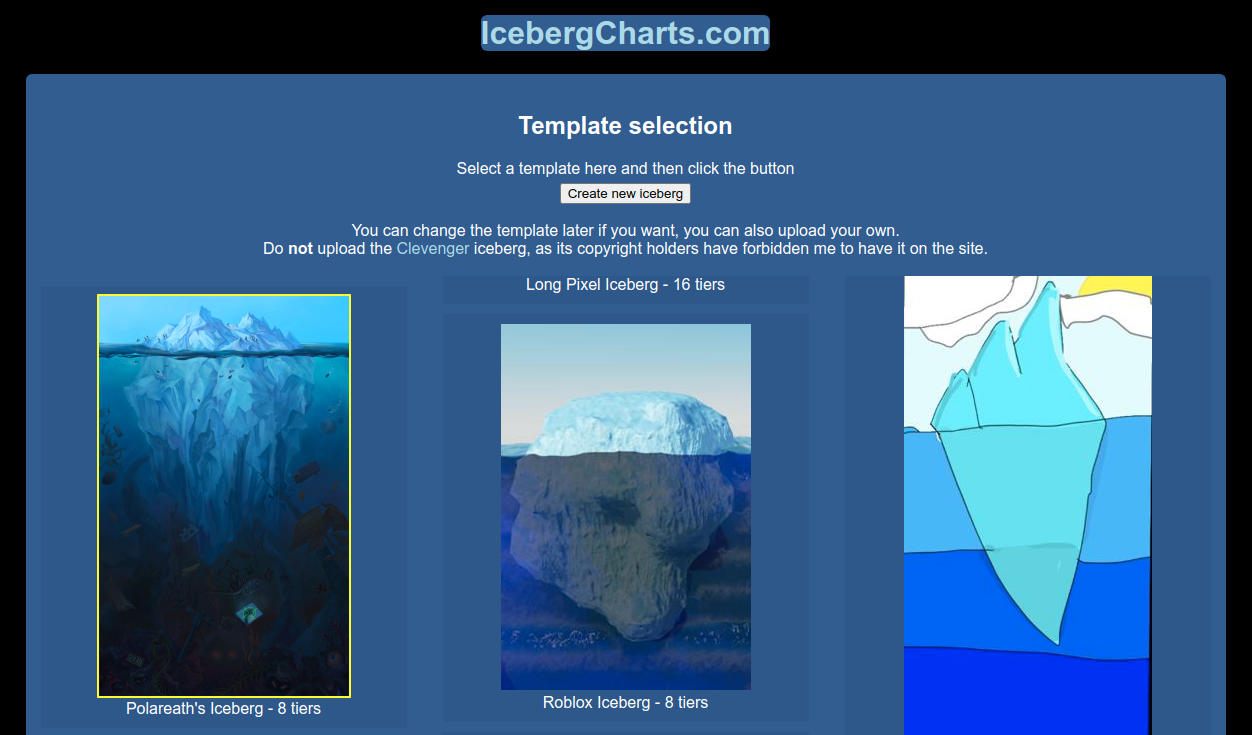
{{ $t('When you have selected the template, click the "Create new iceberg" button again.') }}
{{ $t('On the next page, you can see that there are two links to your iceberg, a private /e/dit link to the edit page, marked in red, and a public v/i/ewing link with the iceberg name, marked in green.') }}
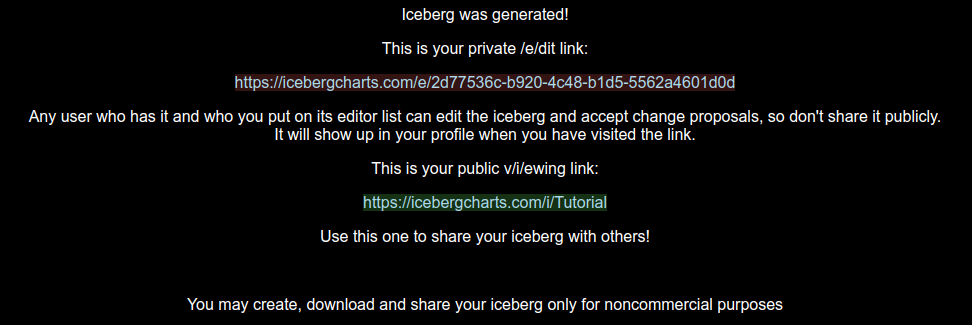
{{ $t('The edit code will be saved in your profile when you visit the edit link.') }} {{ $t('You can create icebergs collaboratively with others by sharing this edit link with them. To allow them to edit the iceberg, you must also add their username to the Iceberg editors list on the edit page.') }}
3. Basic settings
{{ $t('Clicking on the edit link, you\'ll arrive at the edit page:') }}
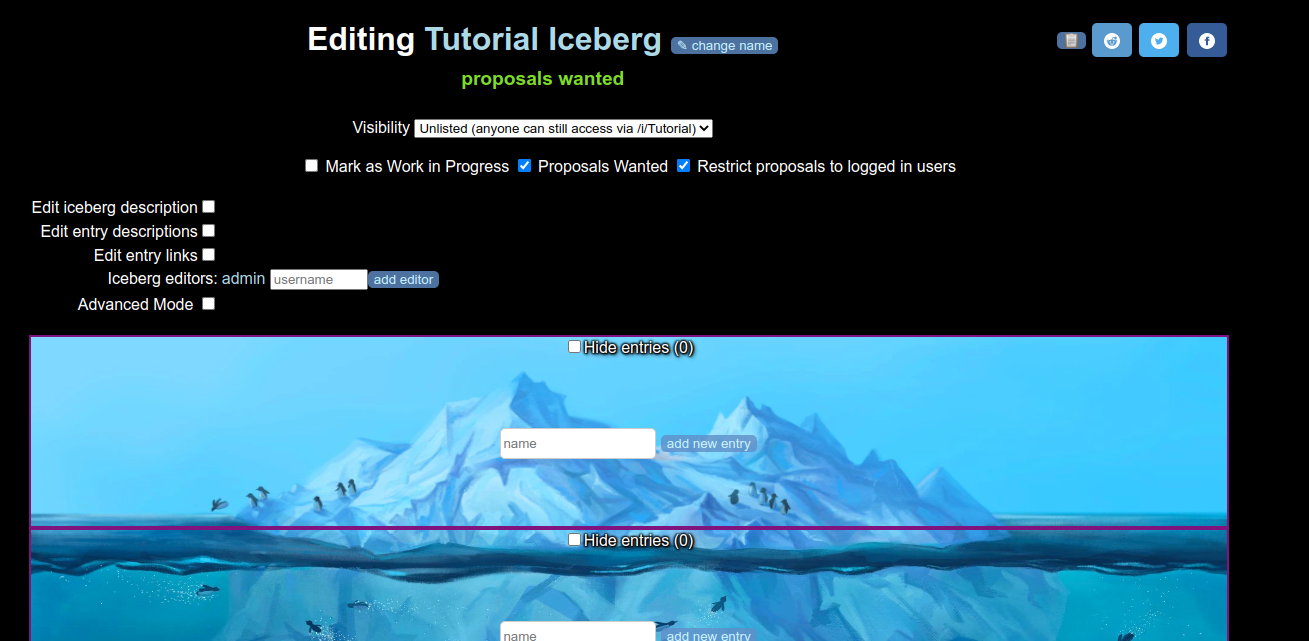
{{ $t('Click on the iceberg name to get to its public page.') }}
{{ $t('At the top, you have an option to change the visibility of your iceberg. There are three options:') }}
- {{ $t('Unlisted (the default): The public iceberg page will be visible to anyone with a link to it, but the iceberg will not appear in your profile or on the main page') }}
- {{ $t('Public and listed on the main page: Selectable if your iceberg has reached the minimum number of entries (15), allows you to choose a category and others to find it through the front or category pages.') }}
- {{ $t('Private: the iceberg can only be viewed and downloaded as an image on the edit page, the public link is disabled') }}
{{ $t('When you set your iceberg to "Public and listed on the main page", please choose the best fitting category') }}
🏯 Anime&Manga - also for western comics and animations
🎨 Art&Culture
📖 Books&Literature
💹 Business&Organizations
🍖 Food&Cooking
🌍 Geography
🕰 History
👶 Human
🌐 Internet
🕸 Lost Media
⛏ Minecraft
🎥 Movies&Television
🎬 Movies&Television-Meta - for charts not about a specific movie or series
🎵 Music
🎼 Music-Meta - for charts not about a specific band
🟥 Roblox
🎭 Roleplaying&Characters - fictional characters and other concepts
🧪 Science
⚽ Sports
📡 Technology
🃏 Traditional Games - board, card games etc., everything non-digital
🚙 Vehicles
🎮 Videogames-Console
🖥 Videogames-PC
🕹 Videogames-Meta - for charts not about a specific game
🪅 Weird
▶ Youtube - for charts about videos, youtubers, video genres or the site itself
Iceberg Charts that aren't really Iceberg Charts belong in the special categories:
🧑🎨 Artbergs - those with only aesthetic content
👨💻 Interactive - icebergs-as-games (maybe try Twine first before using this site)
🔗 Linkbergs - those containing only (untiered) links
🏴☠️ Memes - joke icebergs
🌈 Tierlists - subjective rankings based on personal opinion
👤 Personal - other charts containing personal, subjective content
And for serious charts that don't fit into any specific category:
🧊 Meta&Other
Marking your iceberg as work in progress will display a text marker beside the iceberg name and lets people know that you are not yet done with it.
If you select "Proposals Wanted", people can also propose new entries on the public viewing page (/i/) below the iceberg.

Below the iceberg are also a few options. You can add and hide levels:

and set a creator text, which will show up on the downloaded images. Surround your username with square brackets [[username]] to make it link to your profile on the viewing page, and your profile link to the iceberg.

Here you can also add tags, which are used to group categories even further and helps users to find your iceberg via the
Tag Search 
Finally, you can also remove all entries and delete the iceberg here, and also refresh the edit code for it, in case you accidentally shared it.

4. Basic editing
You can give your iceberg a description by selecting "Edit iceberg description".

By default, each tier only displays a name input form.

After entering a name and clicking the
add new entry button, the new entry will be appended to the list of entries in this tier.

Fields on existing entries are updated automatically if you change them.
You can move entries between tiers by clicking the up or down arrow buttons.
Delete the entry by clicking on the trash bin button.
The entries are only shown as a list on the edit page, visit the public viewing page (by clicking on the iceberg name) to see how your entries are actually layouted.

By default, entries added or changed after 24h after the iceberg was created are highlighted for 6 hours.
This so people who see your iceberg again can see what has changed.

The highlighting won't be visible on downloaded images.
Click here to see how to turn it off anyway.
5. Descriptions and Links
One advantage of creating icebergs on this site rather than in an image editor is that you can add entry descriptions (which will appear if you hover or hold over entries)
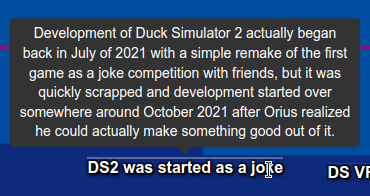
and links (clicking on entries)
which viewers of your iceberg can use to understand the topic better and research it faster.
You can enable these by checking "Edit entry descriptions" and "Edit entry links" respectively.
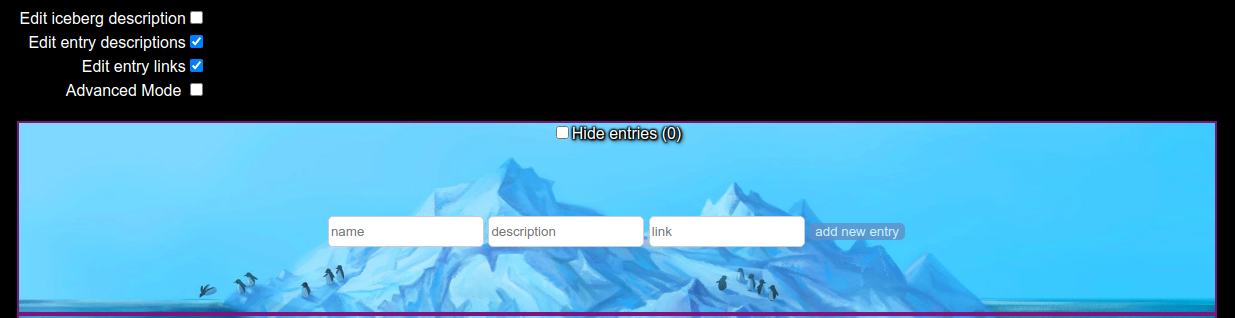
Entries with links will be underlined, those with descriptions overlined.
6. Advanced editing
(work in progress)
Select Advanced Mode to customize your iceberg even further
6.1 Entry Categories
Entry categories allow you to group categories and give each group a different font color. Each entry can belong to one category.

Enable category editing by selecting the
Advanced Mode -> Entries -> Edit Categories checkbox
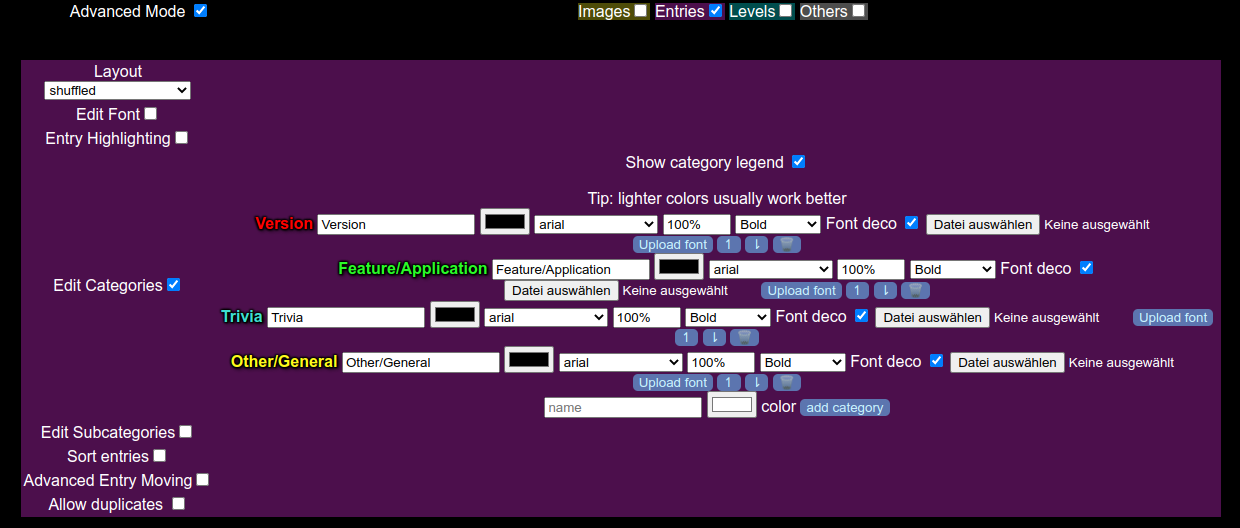
Here you can add new and edit categories with a given font color, font, font size, font style, select whether it should use the default black outline (to make it more readable), or even upload a custom font.
Once there is at least one category, a dropdown selector will appear next to each entry. Click on it and select the category the entry should have.

If the
Show category legend checkbox is enabled, all categories with their names will be shown at the top of the chart. Use the up and down buttons in the category editor to change their order.

6.2 Entry Markers
Entry markers allow you to further distinguish entries with custom icons, which will appear on the top right of the entry name. Unlike with categories, multiple markers can be assigned to each entry.

Enable marker editing by selecting the
Advanced Mode -> Entries -> Edit Entry Markers checkbox
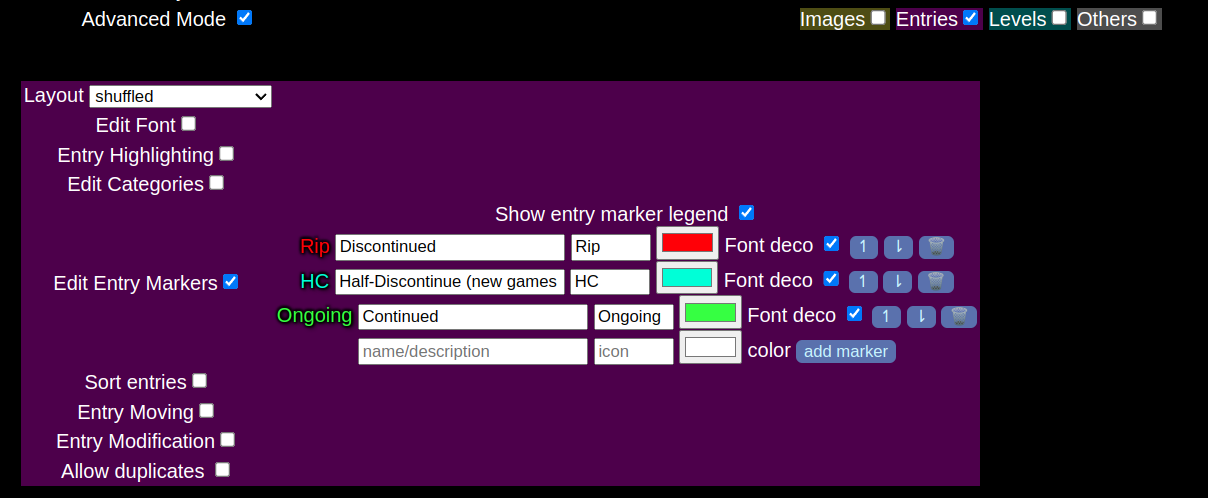
Here you can add new and edit markers with a given name, icon and color.
Once there is at least one marker, a dropdown selector will appear next to each entry. Click on it and select the marker(s) the entry should have, and click on the
+ button. You can add more markers the same way.
Remove a marker on an entry by clicking on the button with their icon on it.

If the
Show marker legend checkbox is enabled, all marker name <-> marker icon associations will be shown at the top of the chart. Use the up and down buttons in the marker editor to change their order.

6.3 Download your iceberg as an image
On the top right of your iceberg are the social sharing buttons and the image download button:

6.4 CSV uploads
Another way to add data to an iceberg is by uploading a .csv file (in advanced mode).
6.5 Entry highlighting
You can change the highlight color and transparency or disable it altogether using
Advanced Mode ->
Entries ->
Entry Highlighting 6.6 Iceberg comments
If an iceberg is public or unlisted, other users can comment on it. You can delete comments made by others on your iceberg from its edit page. You can also report comments to the moderators with the little flag button. You can disable comments altogether using
Advanced Mode ->
Otheres ->
Disable comments
If you have more questions, check the
Frequently Asked Questions page or ask on our Discord or forum!